📦 Lesson 1.2: Installing Daz & the Content Library
Time to get Daz onto your machine. The install itself is easy — the part that trips up newcomers is content: how it's delivered, where it lands on your drive, and why Daz has two different panes for finding it. We'll demystify all of it and get your free Starter Essentials ready to load.
🎯 Learning Objectives
By the end of this lesson, you will be able to:
- Choose between the three ways to install Daz Studio — Daz Central, Daz Install Manager (DIM), and Daz Connect
- Install Daz Studio and claim your free Starter Essentials content
- Explain the difference between an application and a content library
- Tell Smart Content apart from the Content Library and know when to use each
- Find where your content files physically live on disk — and why that matters
Estimated Time: 45 minutes
Project: A working Daz Studio install with Starter Essentials downloaded and visible in the content panes, ready to load a figure in Lesson 1.3.
In This Lesson
App vs Content: The Big Idea
Before we install anything, hold onto one idea — it explains almost every "where did my figure go?" question beginners ask:
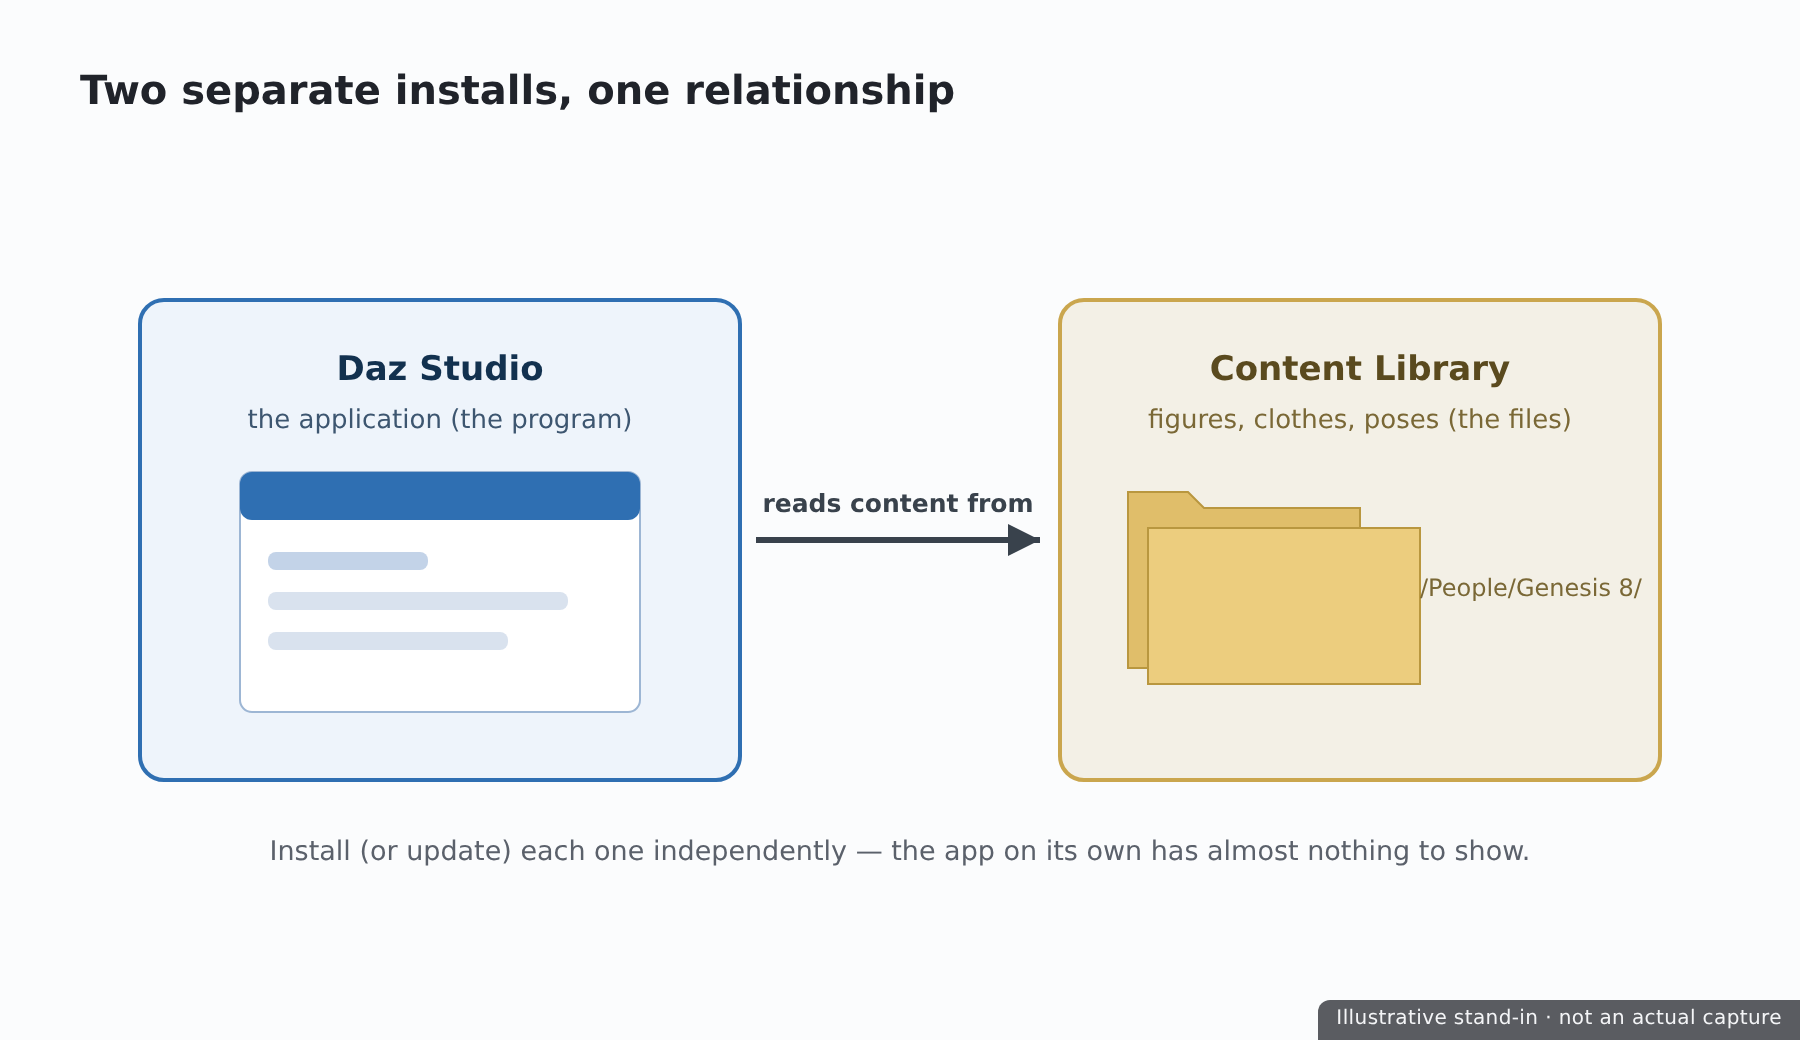
💡 The one-sentence version: Daz Studio is two separate things — the application (the program you open) and your content (the figures, clothing, hair, and poses stored in folders on your drive). They're installed and updated independently.
In most software, the program is the whole thing. Daz is different. The application is a fairly small download. Your content — Genesis figures, outfits, sets — is a growing collection of files that lives in a content library the app reads from. You could reinstall the application tomorrow and all your content would still be sitting there, untouched.
This split is why Daz has dedicated installer tools whose whole job is to download content and drop it into the right folders. Understanding the split now means the panes, paths, and installers ahead will feel obvious instead of mysterious.
Three Ways to Install
Daz gives you three different tools to install the app and manage content. They can even be mixed, but as a beginner you should pick one and stick with it. Here's the honest comparison:
| Method | What It Is | Best For | Watch Out |
|---|---|---|---|
| Daz Central | An all-in-one launcher that installs the app and content with a friendly, modern UI | Absolute beginners who want the simplest path | Less control over exact install folders |
| Daz Install Manager (DIM) | A dedicated download/installer that lists your purchases as installable packages | Anyone who wants clean control over what's installed and where | Slightly more manual; two windows to learn |
| Daz Connect | Installs content from inside Daz Studio itself (the "Smart Content" store integration) | Grabbing a single item quickly while you work | Stores files in a separate "Cloud" location that confuses many users |
📖 Definition
DIM (Daz Install Manager): a small companion program, separate from Daz Studio, that logs into your account, lists everything you own as downloadable packages, and installs them into your content library. It's the long-standing favorite of experienced users because it's predictable and easy to reinstall or uninstall from.
✅ Our recommendation for this course
If you want the simplest start, use Daz Central — one app, one button. If you'd like the tidiest, most controllable setup (and the habits experienced users build), use DIM. Either works for everything in this course. We'll show the DIM path in detail because it makes where files live crystal clear — the single most useful thing to understand early.
Here's how the three relate to the app and your content library:
⚠️ Important Note: Don't try to install the same content through two methods at once. Mixing DIM and Daz Connect installs of the same product is the classic cause of duplicate entries in your content panes. Pick one primary method now.
Installing Daz Studio
The exact clicks differ slightly between Central and DIM, but the shape is the same everywhere. Here's the full arc so you know what to expect before you start:
The DIM path, step by step
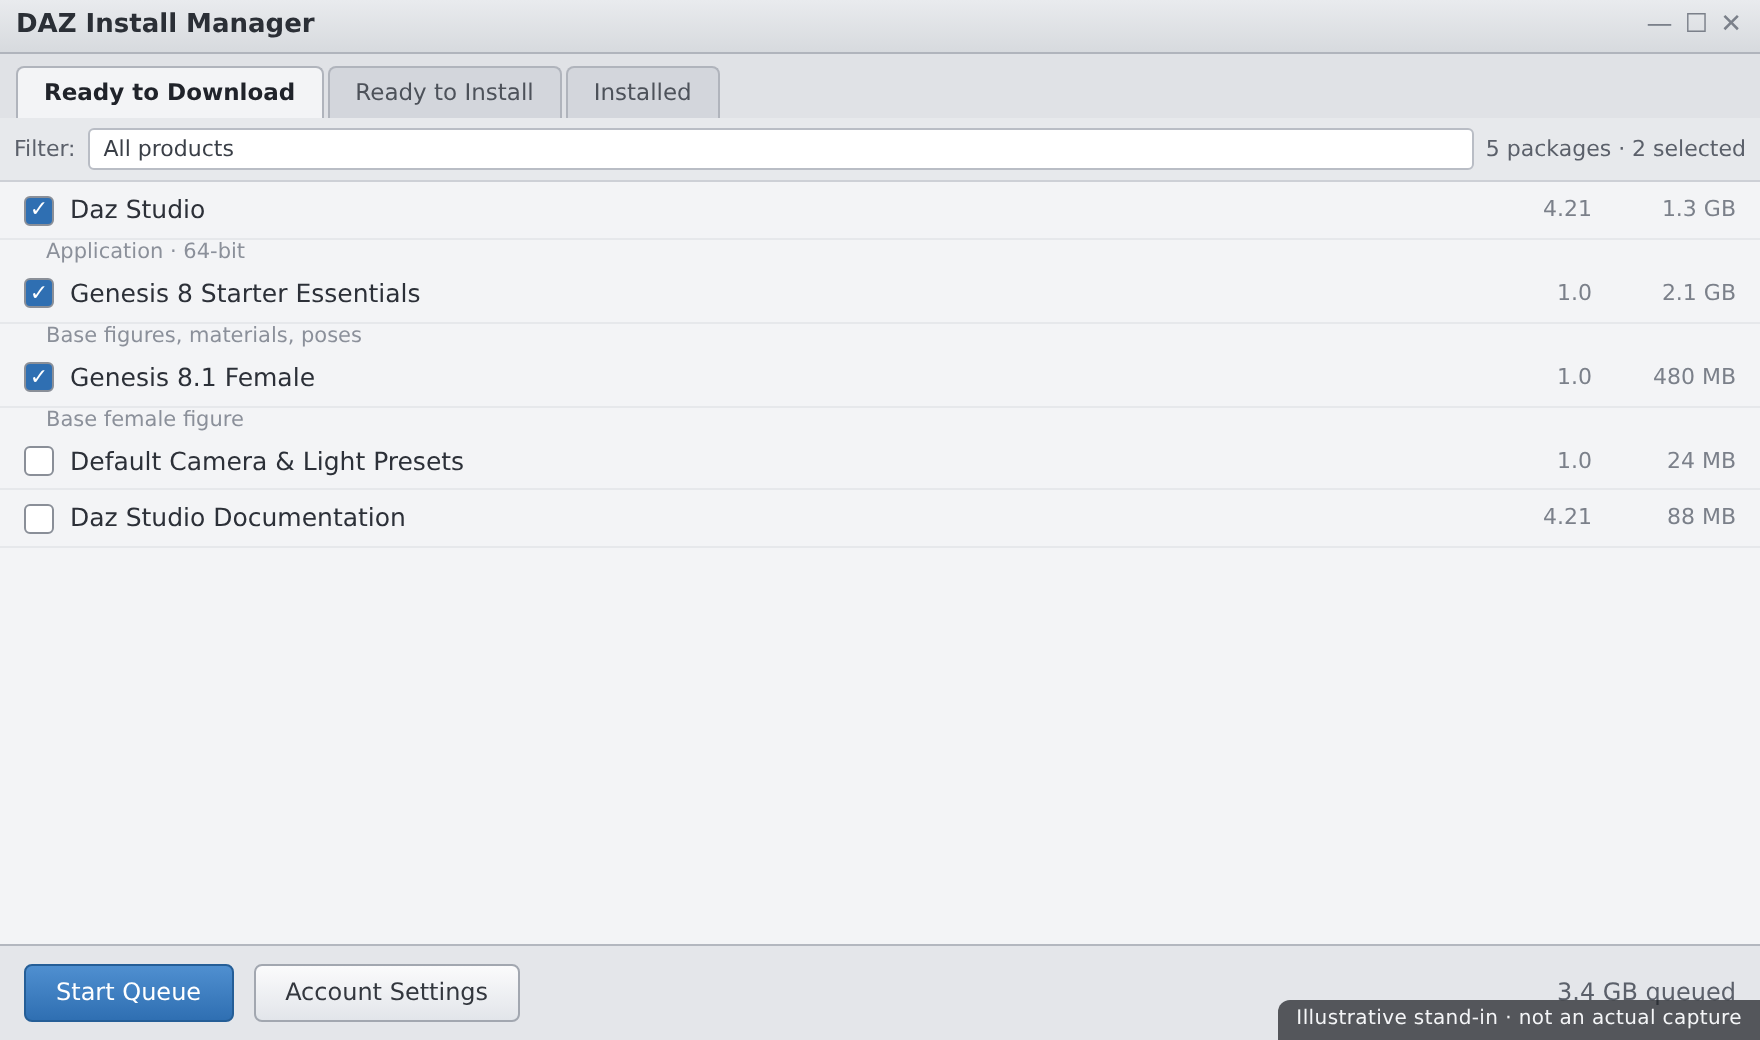
- Go to daz3d.com/get_studio and download the Daz Install Manager for your OS (Windows or macOS).
- Run the DIM installer and open DIM. Sign in with the free account you created in Lesson 1.1.
- DIM shows a Ready to Download tab listing everything on your account. At minimum you'll see Daz Studio itself and the Starter Essentials packages.
- Tick Daz Studio (and its Starter Essentials) and click Download. When downloads finish, the items move to Ready to Install — click Install.
- That's it. Daz Studio is now installed, and its starter content is in your library.
💡 Doing it with Daz Central instead?
Download Daz Central from the same page, sign in, and click Install next to Daz Studio. Central handles the app and its starter content together — fewer steps, less visible detail. You can always add DIM later; they coexist happily as long as you don't double-install the same product.
⚠️ Watch Out — the first launch is slow
The very first time Daz Studio opens, it builds a database of your content and may show a PostgreSQL setup / "Content Management Service" prompt. Let it finish and accept the defaults. This one-time indexing is what powers Smart Content — if you skip or block it, Smart Content will look empty later.
Claiming Starter Essentials
Every free Daz account can claim the Starter Essentials bundles at no cost. These are the base building blocks — and everything this course needs.
| Bundle | What's Inside | Why You Need It |
|---|---|---|
| Genesis 8 Starter Essentials | The Genesis 8 base figures (male & female) plus starter shapes and materials | The figure you'll pose, shape, and render all course long |
| Genesis 9 Starter Essentials | The newer Genesis 9 base figure and starter content | Optional — grab it to try the newest generation |
| Default lights, cameras & shaders | Basic Iray materials and utility presets | Enough to light and render without buying anything |
✅ Pro Tip — if the bundles aren't in DIM
If Starter Essentials don't appear in your DIM download list, they may not be attached to your account yet. Log in at daz3d.com, search the store for "Genesis 8 Starter Essentials," and add the free item to your cart and "check out" (it costs nothing). It'll then show up in DIM. This one-time step catches a lot of beginners.
⚠️ Important Note: For this course, Genesis 8 is our default figure because it has the deepest free and paid content library. Installing G9 too is fine, but when a lesson says "load the base figure," reach for Genesis 8 unless told otherwise.
Smart Content vs Content Library
Inside Daz Studio you'll find two panes that both show content. New users constantly wonder why. Here's the clean mental model:
| Smart Content | Content Library | |
|---|---|---|
| What it shows | Content organized by metadata — categories, and what's compatible with your selected figure | The raw folder structure on disk, exactly as files are stored |
| Killer feature | Select a figure and it filters to only what fits — "show me hair for this Genesis 8 character" | Always shows everything, even content without metadata |
| Depends on | The content database (the indexing step from first launch) | Nothing — it just reads folders |
| Best when | You want the right item fast and don't care where it lives | Metadata is missing, or you want to browse by folder |
📖 Definition
Metadata: extra information attached to a content file — its category, which figure it fits, its thumbnail, and tags. Smart Content is powered entirely by metadata; Content Library ignores it and just shows folders. This is why a freshly installed item can appear in one pane but not the other.
💡 The rule of thumb
Use Smart Content for day-to-day work — it's faster and context-aware. Fall back to the Content Library when something you know you installed doesn't show up in Smart Content (usually a metadata issue), or when you prefer browsing folders directly. Both point at the same files on disk; they're just two windows onto the same shelf.
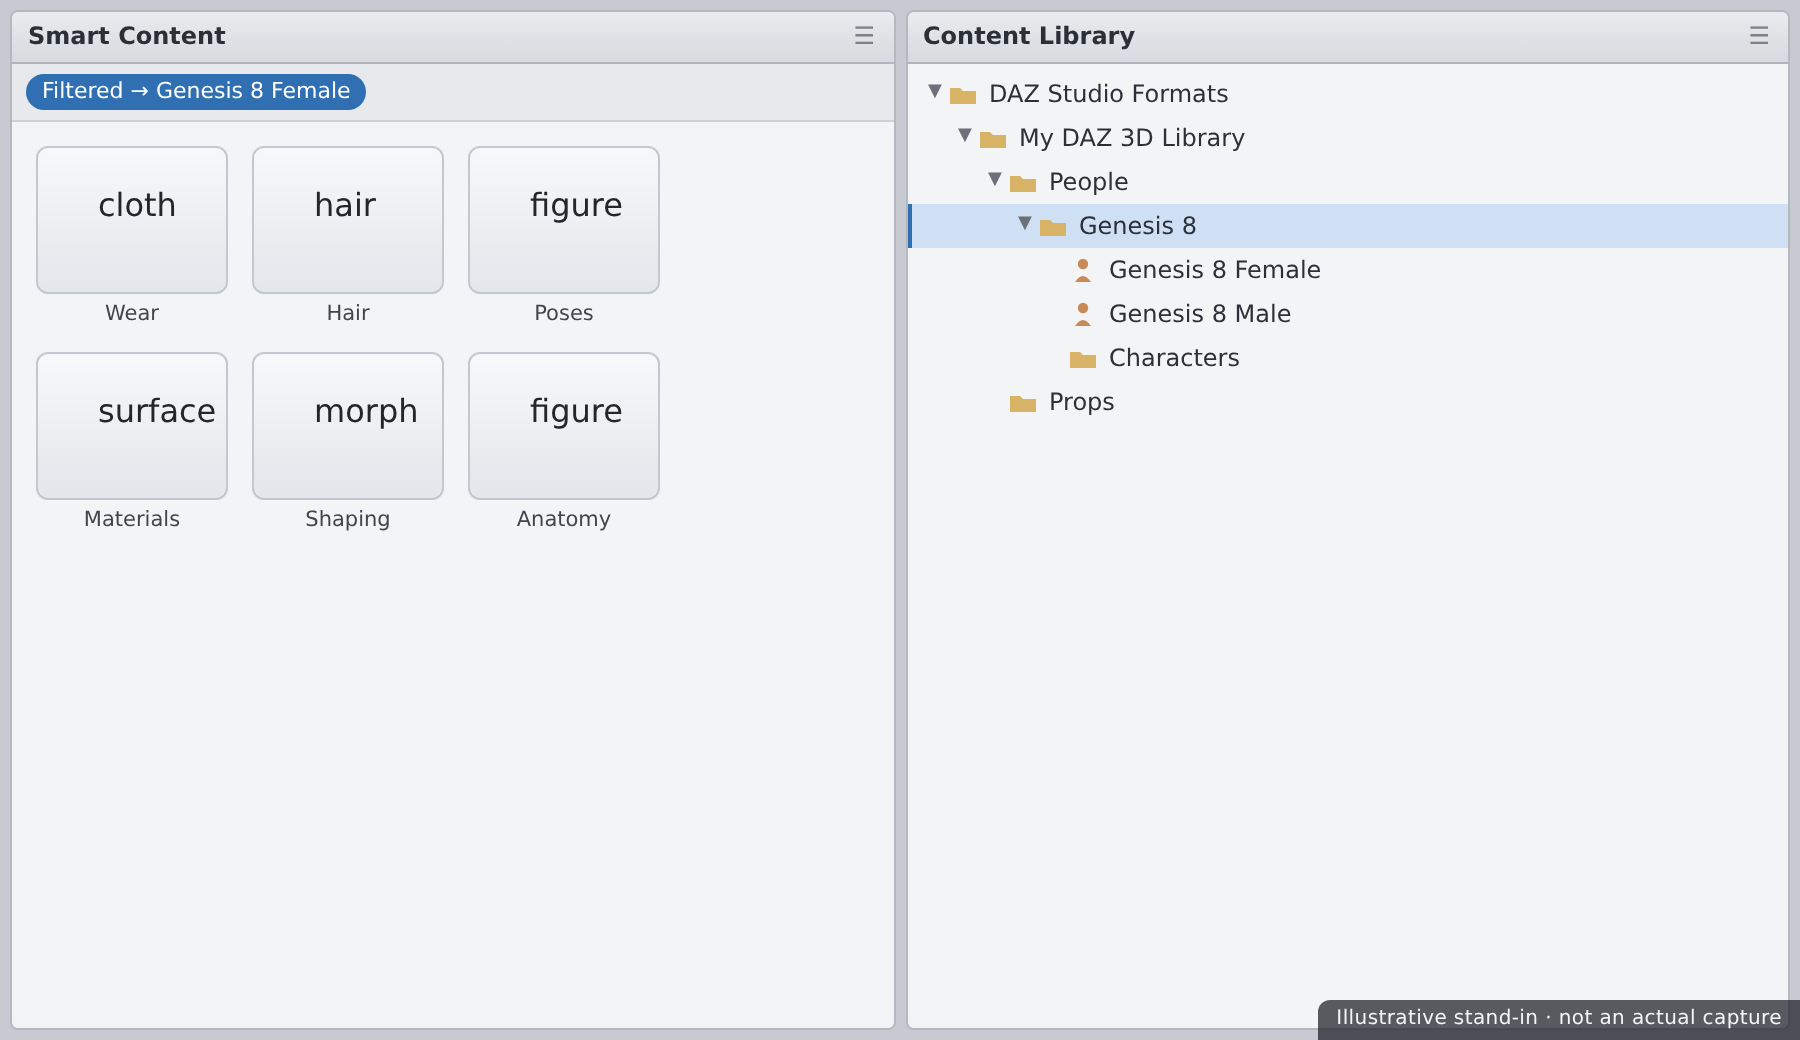
⚠️ Important Note: If Smart Content looks empty right after installing, don't panic. It usually means the content database is still building or the item lacks metadata. Switch to the Content Library pane and browse to People > Genesis 8 — your figure will be there. We'll re-index in the hands-on exercise.
Where Your Files Actually Live
This is the knowledge that separates confident Daz users from frustrated ones. Content is just files in content directory folders that you can see in your OS file browser. When Daz "can't find" something, it's almost always a directory-mapping issue — not a lost file.
The default content directory
By default, DIM installs content into a folder like this (Windows shown; macOS is analogous under your user Library):
📁 Typical Windows content path
C:\Users\Public\Documents\My DAZ 3D Library\
Inside it you'll find familiar folders: People\, Runtime\, data\, Environments\, and more. Your Genesis 8 figure lives under People\Genesis 8\.
Daz Studio doesn't magically know about that folder — you map it in preferences so the app knows which directories to read. DIM and the app usually agree on this automatically, but when they don't, content "disappears." The fix is always the same: make sure the app's content directories point at the folder your installer wrote to.
💡 Where to check the mapping
In Daz Studio: Edit → Preferences → Content → Content Directory Manager (on macOS, DAZ Studio → Preferences). This lists every folder Daz treats as a content library. If a path here matches where DIM installed, everything shows up. If not, add the correct folder and click your content pane's refresh.
Three storage locations, briefly
- DAZ Studio Formats — modern content (
.duffiles): figures, poses, materials. This is where most things live. - Poser Formats — older
Runtime-style content, still widely used for textures and legacy items. - Daz Connect (Cloud) — a separate
data/cloudlocation used only when you install through Daz Connect. This is the "why do I have duplicates?" culprit, and the main reason we recommend picking one install method.
✅ Pro Tip — put your library on a fast, roomy drive
Content grows quickly. During install you can point DIM at any folder — many users put My DAZ 3D Library on a large SSD (e.g. D:\Daz\My DAZ 3D Library) for speed and space. Just make sure Daz Studio's Content Directory Manager points at the same place. Decide this before you install a lot, since moving content later means re-mapping paths.
⚠️ Important Note: Never rename or move content folders by hand once Daz knows about them, unless you also update the Content Directory Manager. The files aren't lost when you move them — but Daz will act like they are until the mapping is fixed.
Hands-on: Install & Verify
Let's turn all of this into a working setup. By the end you'll have Daz installed, Starter Essentials downloaded, and your figure visible in both content panes.
🏋️ Exercise 1: Install Daz & Starter Essentials
Objective: Get the application and base content onto your machine.
Steps:
- Download either Daz Central or Daz Install Manager from daz3d.com/get_studio and sign in.
- Install Daz Studio.
- Install Genesis 8 Starter Essentials. (If it's not listed, claim the free item in the store first — see the Pro Tip above.)
- Launch Daz Studio. Let the first-run content indexing finish completely.
🏋️ Exercise 2: Confirm Content in Both Panes
Objective: Prove your content is installed and mapped correctly.
Steps:
- Open the Content Library pane (Window → Panes → Content Library if it's hidden).
- Browse to
DAZ Studio Formats → My DAZ 3D Library → People → Genesis 8. You should see your figure and starter presets. - Open the Smart Content pane. Under Figures, confirm the Genesis 8 base figure appears.
- If Smart Content is empty, go to Content DB Maintenance (right-click the pane's options menu → Content DB Maintenance) and run Re-Import Metadata. Refresh the pane.
💡 Hint — my figure shows in Content Library but not Smart Content
That's a metadata/database issue, not a missing file. Run Re-Import Metadata from Content DB Maintenance, or confirm the Content Management Service (PostgreSQL) is running. The file is fine — Smart Content just hasn't indexed it yet.
🏋️ Exercise 3: Locate Your Library on Disk
Objective: Connect the app's view to the real files.
Steps:
- Open Edit → Preferences → Content → Content Directory Manager.
- Note the folder listed under DAZ Studio Formats (e.g.
...\My DAZ 3D Library). - Open that folder in your OS file browser and find
People\Genesis 8\. Seeing the real files there is the whole point — content is just files in mapped folders.
🎯 Quick Quiz
Question 1: What is the main difference between Smart Content and the Content Library?
Question 2: Your Genesis 8 figure appears in the Content Library but not in Smart Content. What's the most likely cause?
Question 3: Why does this course recommend picking one install method (e.g. DIM or Daz Central) rather than mixing them?
Best Practices
✅ Do's
- Pick one install method (DIM or Daz Central) and use it consistently to avoid duplicate content.
- Let the first-run indexing finish so Smart Content works from day one.
- Know your content path — check the Content Directory Manager once so you always know where files live.
- Install your library on a fast, roomy drive before you accumulate a lot of content.
❌ Don'ts
- Don't hand-move content folders without updating the Content Directory Manager afterward.
- Don't double-install the same product through both DIM and Daz Connect.
- Don't assume a missing item is lost — check the Content Library pane and your directory mapping first.
💡 Pro Tips
- Keep DIM installed even if you use Central — it's the fastest way to reinstall or uninstall a specific product cleanly.
- The
My DAZ 3D Libraryfolder can be backed up like any other folder. Back it up before big reorganizations. - If a store product won't appear in DIM, re-log in — DIM refreshes your entitlements on sign-in.
Summary
🎉 Key Takeaways
- Daz is two things: the application and your content library, installed and updated separately.
- Three install tools — Daz Central (simplest), DIM (most control), and Daz Connect (in-app) — pick one and stick with it.
- Free Starter Essentials (Genesis 8) is all this course needs; claim it if it's not already on your account.
- Smart Content is metadata-driven and compatibility-aware; the Content Library shows the raw folder tree — both point at the same files.
- Content is just files in mapped folders; the Content Directory Manager is where the app learns where they live.
📚 Additional Resources
- Download Daz Studio, DIM & Daz Central
- Daz Install Manager — official documentation
- Finding & managing content — Daz user guide
🚀 What's Next?
With Daz installed and content ready, Lesson 1.3 — The Daz Studio Interface gets you comfortable in the workspace: navigating the viewport, reading the Scene and Parameters panes, arranging tabs and layouts, and saving a setup that fits how you work.
🎉 You're installed!
The trickiest part of Daz for beginners — content, panes, and paths — now makes sense. Everything from here is the fun part: figures, poses, light, and renders. Let's open the workspace.