🎭 Lesson 2.2: Shaping Characters with Morphs
Your figure can strike any pose — but it's still the default person. This lesson changes who the figure is. With the Shaping pane and a handful of morph dials, you'll sculpt the generic Genesis base into a distinct character: a face that's yours, a body with a real build, an expression with feeling. This is where a render stops looking like "a Daz figure" and starts looking like someone.
🎯 Learning Objectives
By the end of this lesson, you will be able to:
- Explain what a morph is and how it reshapes a figure without changing its rig
- Navigate the Shaping pane and find head, body, and expression morphs
- Apply a character preset for an instant full-figure shape
- Dial custom head and face features to build a unique face
- Adjust body proportions and build with body morphs
- Add expressions to bring emotion to the face
- Mix morphs responsibly and save your character as a Shaping preset
Estimated Time: 55 minutes
Project: A one-of-a-kind character dialed from the Genesis base — custom face, adjusted body, and a natural expression — saved as your first Shaping preset.
In This Lesson
What Are Morphs?
In Lesson 2.1 you posed a figure by rotating its bones. Shaping is the other half of the story: instead of moving the skeleton, you reshape the mesh — the skin surface itself. The tool that does this is the morph.
💡 The one-sentence version: A morph is a slider that smoothly reshapes a figure — a longer nose, a wider jaw, a heavier build — by pushing the mesh toward a saved target shape, all without touching the rig.
📖 Definition
Morph: a stored deformation of a figure's mesh, exposed as a dial that runs from 0 (no effect) to 1 (full effect), and often beyond. Dialing it to 0.5 applies half the shape. Because morphs move vertices and leave the skeleton alone, a morphed figure still poses exactly the same way.
Morphs are why one Genesis base can become almost anyone. A character you buy or download is really just a bundle of morphs (plus materials): dial them all to 1 and you get that artist's face and body; dial them partway, or mix several, and you get something new.
💡 Morphs vs poses vs materials
Three separate systems reshape a Genesis figure, and it's worth keeping them straight: poses rotate bones (Lesson 2.1), morphs reshape the mesh (this lesson), and materials paint the surface (Lesson 2.3). They're independent — changing one never disturbs the others.
⚠️ Important Note: Morphs only appear if they're installed for that figure. A base Genesis 8 figure has a modest set of built-in shaping dials; the huge libraries of faces and bodies come from character products and morph packs you add. If a dial you expect is missing, the morph simply isn't installed yet.
The Shaping Pane
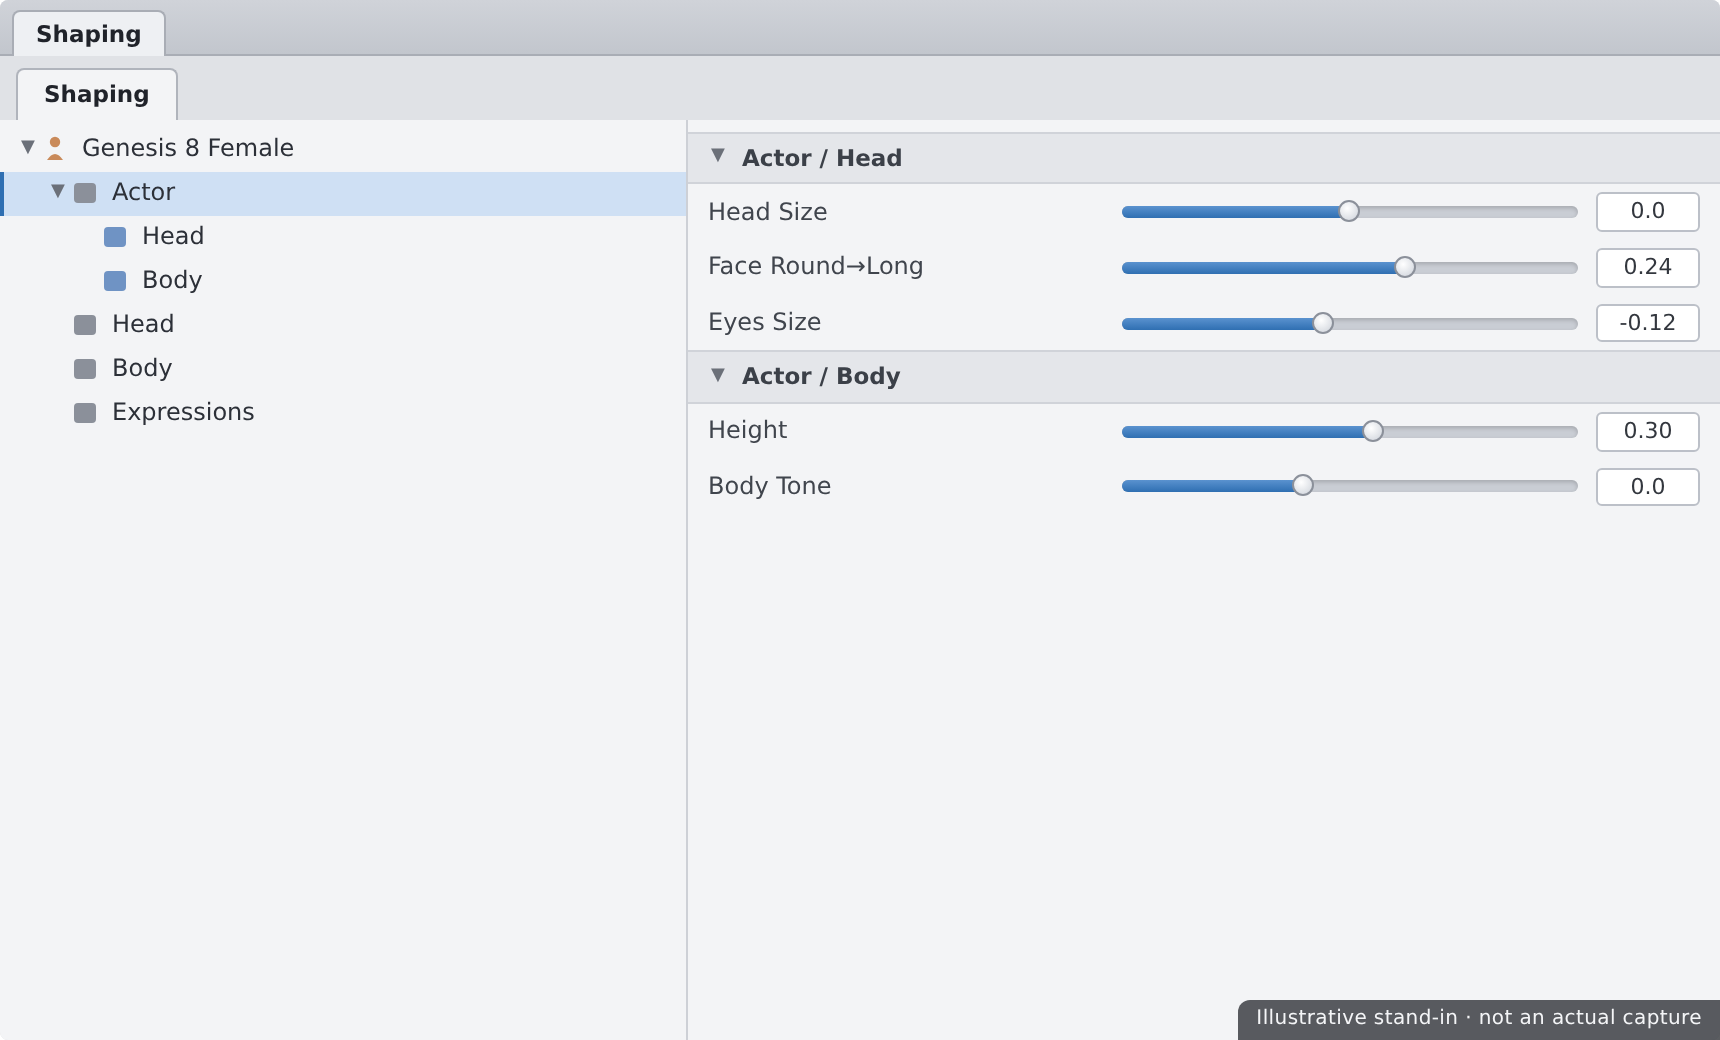
Every morph lives in the Shaping pane — your control room for a figure's shape. Open it from Window → Panes (Tabs) → Shaping if it isn't already in your layout.
📖 Definition
Shaping pane: the pane that gathers all of a selected figure's morph dials, organized into groups. It's a filtered, purpose-built view of the same properties you'd find scattered through the Parameters pane — but arranged for the job of sculpting a character.
How it's organized
With a figure selected, the Shaping pane shows a category list down the side. The exact groups depend on what's installed, but you'll almost always see:
- Actor — full-character morphs that reshape the whole figure at once (this is where installed characters usually appear).
- Head — face and skull morphs, often sub-grouped into eyes, nose, mouth, ears, jaw.
- Body — proportion and build morphs: height, weight, muscle, and region-by-region shaping.
- Expressions — emotion and phoneme morphs that pose the face (sometimes under a Head sub-group).
Here's how those categories relate — a mental map of the pane:
💡 Select the figure first
Like poses and materials, the Shaping pane always shows the currently selected figure. If the pane looks empty or wrong, click the figure in the Scene pane first. Selecting a piece of clothing or a prop shows its morphs instead — a common source of "where did my dials go?"
Character Presets: Instant Shapes
Just as pose presets give you an instant pose, character presets give you an instant shape. Double-click a character in your content library (with the figure selected) and its full set of morphs dials in at once — a complete face and body in a single click.
📖 Definition
Character preset: a saved package that dials a group of morphs to preset values to produce a specific, named character. It's the fastest way to a finished shape, and — because it's just morph values — a perfect starting point you can then adjust dial by dial.
The full-character workflow
Building a character rarely means dialing from zero. The realistic path looks like this:
✅ Pro Tip — start from a preset, then make it yours
A pure preset is recognizable — other artists own the same product and use the same face. Dial it to 70–90%, then nudge a few features (a different nose, a stronger jaw), and you've got a character nobody else has. "Preset as a base, hand-tuning on top" is exactly the posing lesson's advice applied to shape.
⚠️ Important Note: A character preset often sets both shape (morphs) and skin (materials). If you only want the shape, look for a shaping or shape-only version, or dial the head/body morphs directly instead of applying the full character. Read the product's contents so you know what a double-click will change.
Shaping the Head & Face
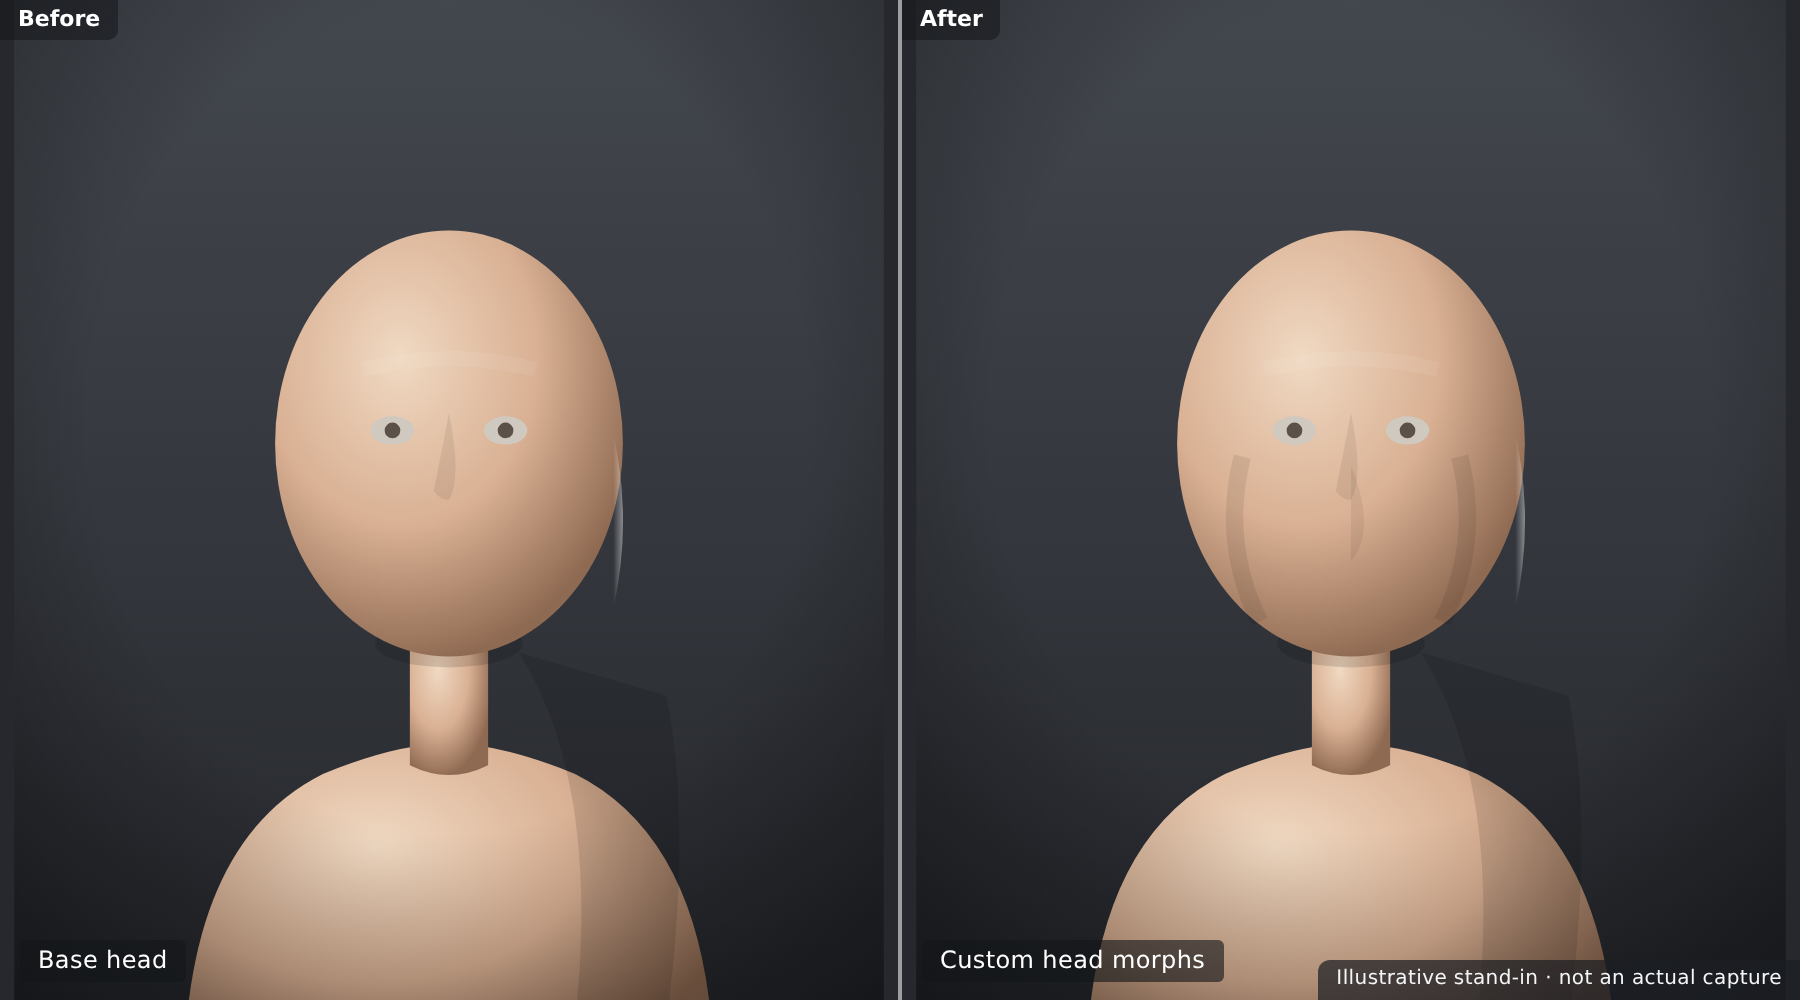
The face is where a character earns its identity. In the Shaping pane's Head group you'll find dials for every feature — and small, combined moves read as far more convincing than one dramatic one.
What the head dials control
| Feature area | Typical dials | What it changes |
|---|---|---|
| Eyes | Size, height, depth, slant, spacing | How large, deep-set, and far apart the eyes read |
| Nose | Length, width, bridge height, tip shape | Profile and front-on character of the nose |
| Mouth & jaw | Lip fullness, mouth width, jaw width, chin shape | The lower-face structure that carries a lot of "look" |
| Overall head | Head scale, face shape, cheekbones, age | The broad proportions everything else sits inside |
💡 Dial values below 1 — and negative
Most morphs accept values past their 0–1 range. Push a dial to 1.5 for an exaggerated feature, or into negative values to go the opposite way (a "nose length" of −0.3 shortens it). The dial's default is 0, meaning "no change from the base." Right-click a dial for a precise numeric entry.
✅ Pro Tip — work at eye level, framed close
Shape the face with the camera at the figure's eye level and framed tight on the head, rotating around it as you dial. Reshaping a face while looking down at it from the default view hides exactly the proportions you're trying to judge. Press F after selecting the head to frame it.
⚠️ Important Note: It's easy to overshoot. A nose at 1.0 on top of a character preset that also lengthens the nose can stack into a caricature. Dial gently, rotate to check the profile, and judge the whole face together rather than one feature in isolation.
Shaping the Body
The Body group controls proportion and build — height, weight, muscle, and finer region shaping. Body morphs do a lot of the work of making a character read as a specific person before the face is even close.
The big-picture dials
- Height — overall scale along the vertical; a surprisingly strong identity cue.
- Weight / Body Fat — softens or slims the whole silhouette.
- Muscularity / Definition — adds or removes visible muscle tone.
- Region shaping — targeted dials for torso, arms, legs, hands, and feet when you need finer control.
📖 Definition
Full-body morph (FBM): a single morph that reshapes the entire figure in a coordinated way — a "heavier build" FBM adjusts torso, limbs, and face together so the result stays anatomically consistent. Character presets are usually built from one or more FBMs plus head detail.
💡 Proportion sells realism
Real people vary more in proportion than in any single feature. A slightly shorter figure with a fuller build and a smaller head reads as a completely different person than the default — even with the same face. Spend as much attention on body proportion as on the face.
⚠️ Important Note: Extreme body morphs can cause pokethrough and fit problems when you add clothing later — a body dialed far past the base may push through garments built for the default shape. Auto-follow morphs help clothing keep up, but the more extreme the body, the more fit-up you'll do. Keep builds believable unless the project needs otherwise.
Expressions
An expression is a morph too — but one that poses the face rather than reshaping its underlying structure. A neutral face is lifeless; a subtle expression is the difference between a mannequin and a character.
📖 Definition
Expression morph: a morph that moves the face into an emotion (smile, surprise, anger) or a speech shape (a phoneme like "oh" or "ee"). They live in the Expressions group and layer on top of your character's structural morphs without changing who the character is.
Applying expressions
- Expression presets dial a full expression in one click — the fastest route to a feeling face.
- Individual expression dials (brow raise, smile, squint) let you build a custom expression or soften a preset.
- Because expressions are morphs, you can blend them — a little smile plus a slight brow raise reads as warmth.
✅ Pro Tip — dial expressions down
Full-strength expression presets often look theatrical. Apply one, then pull it back to 40–70%. A restrained smile or a barely-there frown almost always looks more real and more flattering than the same expression at 100%. Subtlety reads as authenticity.
⚠️ Important Note: Keep expressions separate from structural head morphs in your mind. If you bake a big smile into your saved character shape, every render of that character will smile. Save the character's structure, and apply expressions per shot — you'll thank yourself later.
Mixing Morphs Responsibly
The real creative power is mixing — combining morphs from different sources into a character that's uniquely yours. Done well it's limitless; done carelessly it produces broken, melty faces. A few habits keep you on the right side.
Habits of clean mixing
- Blend, don't max. Two characters at 0.5 each usually look better than one at 1.0 — and nobody recognizes the source.
- Change one thing at a time. Dial a morph, rotate to judge it, then move on. Ten dials moved at once are impossible to debug.
- Watch the seams. Heavy head morphs from one product plus a body from another can mismatch at the neck; check where regions meet.
- Zero to reset. Edit → Zero → Zero Figure Shape wipes all shaping back to the base if a mix goes wrong — the shaping equivalent of Zero Figure Pose.
💡 Saving your character
Once you've built a shape worth keeping, save it: with the figure selected, File → Save As → Shaping Preset…. Like a pose preset, it stores only the morph values — no mesh — so it's tiny and reapplies to any compatible Genesis figure. Save it into a mapped content folder (Lesson 1.2) so it shows up in your panes.
⚠️ The morph-strength trap
Stacking several products that each nudge the same feature adds up fast. If your figure suddenly looks distorted, don't hunt blindly — Zero Figure Shape and rebuild the mix one dial at a time. It's faster than trying to subtract your way out of a pile-up.
⚠️ Important Note: Morphs you mix must be installed and licensed for the figures you share renders of — but the mixed result you save is just dial values referencing those morphs, not the morph data itself. Sharing your Shaping preset with someone who lacks the source morphs means it won't reproduce your character. Keep note of what a mix depends on.
Hands-on: Build a Character
Time to sculpt. You'll shape a face, adjust a body, add an expression, and bank the result as your own Shaping preset.
🏋️ Exercise 1: Preset & Face
Objective: Get a starting shape and make the face your own.
Steps:
- Load a Genesis 8 figure and open the Shaping pane. If you own a character, apply it as a starting preset; otherwise start from the base.
- Select the figure's head and press F to frame it at eye level.
- In the Head group, adjust three features — say nose length, jaw width, and eye size — keeping each change modest. Rotate to check the profile as you go.
🏋️ Exercise 2: Body & Expression
Objective: Give the character a build and a feeling.
Steps:
- In the Body group, set an overall Height and a Weight or Muscularity value so the silhouette reads as a specific build.
- Open the Expressions group and apply an expression preset, then dial it back to roughly 50%.
- Frame the whole figure and judge face and body together. Adjust anything that fights for attention.
💡 Hint — my character suddenly looks distorted
You've probably stacked morphs that touch the same feature (a preset that lengthens the nose plus your own nose dial, for example). Don't try to subtract your way out — use Edit → Zero → Zero Figure Shape and rebuild the mix one dial at a time, checking after each.
🏋️ Exercise 3: Save Your Character
Objective: Bank the shape as a reusable preset.
Steps:
- Zero any expression back to neutral so you save structure, not a smile.
- With the figure selected, choose File → Save As → Shaping Preset… and save it into a
My Charactersfolder, named something likeRen 01. - Load a fresh Genesis 8 figure and apply your preset to prove your character reappears. That's a complete shaping workflow.
🎯 Quick Quiz
Question 1: What does a morph actually change on a Genesis figure?
Question 2: You expect a "nose length" dial but it isn't in the Shaping pane. What's the most likely reason?
Question 3: Why dial an expression preset back to 40–70% instead of leaving it at 100%?
Best Practices
✅ Do's
- Start from a character preset at 70–90%, then hand-tune a few features to make it unique.
- Shape the face at eye level, framed close, rotating to judge the profile.
- Change one dial at a time and check before moving on.
- Give proportion real attention — height and build define a character as much as the face.
- Save your character as a Shaping preset into a mapped content folder.
❌ Don'ts
- Don't max every dial — stacked full-strength morphs pile into caricature and distortion.
- Don't bake expressions into a saved shape — keep structure and expression separate.
- Don't ignore the neck seam when mixing a head from one product with a body from another.
- Don't push body morphs so far that clothing can't follow, unless the project needs it.
💡 Pro Tips
- Blend two characters at partial strength to make a face nobody else owns.
- Use Zero Figure Shape freely — it's your safe "start the mix over" button.
- Note which morph products a saved mix depends on, so it reproduces on other machines.
- Save partial shapes (a great nose, a favorite body build) to layer onto future characters.
Summary
🎉 Key Takeaways
- A morph reshapes a figure's mesh toward a saved target and leaves the rig untouched, so morphed figures still pose normally.
- The Shaping pane gathers a figure's morphs into Actor, Head, Body, and Expressions groups — for the selected figure.
- Character presets give an instant full shape; dial them to 70–90% and hand-tune to make them yours.
- Head and body morphs build identity — small combined moves and honest proportion beat any single extreme dial.
- Expressions are morphs too; keep them separate from structure, and mix responsibly — blend, change one thing at a time, and Zero Figure Shape to reset.
📚 Additional Resources
- The Shaping pane — official Daz user guide
- Working with morphs — Daz documentation
- About the Genesis 8 figure
🚀 What's Next?
Your character now has a face, a body, and a feeling all its own — but the skin is still the default surface. In Lesson 2.3 — Materials & Iray Surfaces, we bring the figure to life at the surface level: the Surfaces pane, the Iray Uber shader, and the material tweaks that turn a shaped figure into a believable, render-ready character.
🎉 You made someone!
From a generic base to a distinct character with your own face, build, and expression — that's the creative heart of Daz. Every render from here is your character, not a stock figure. Next, let's make that skin look real.